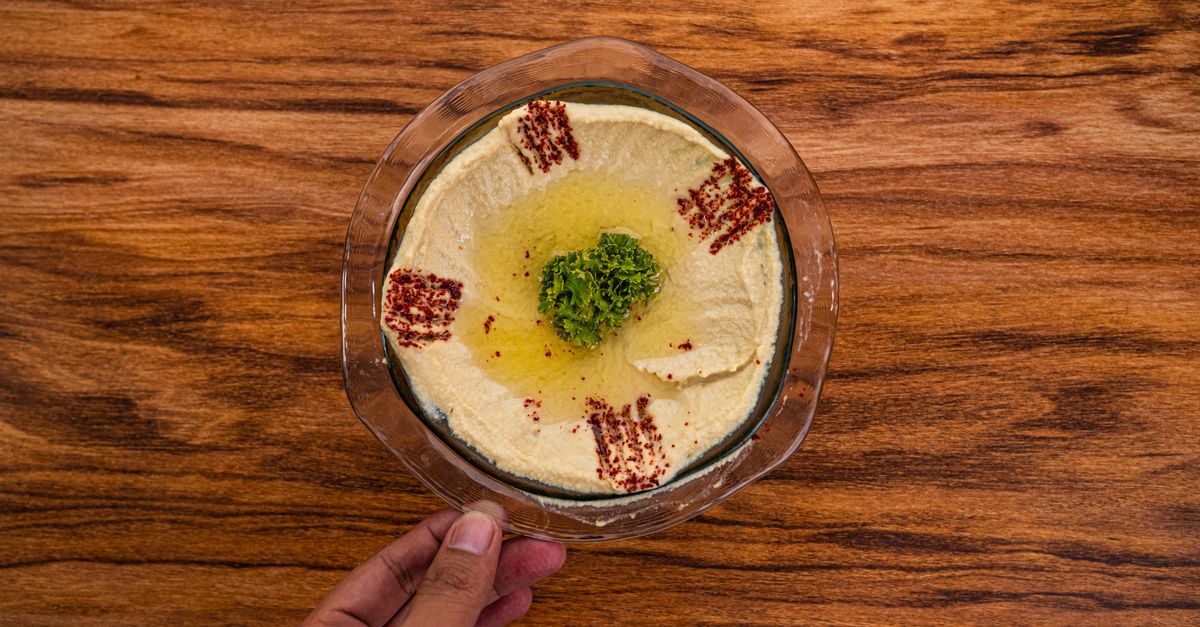
Why Your Homemade Hummus Lacks Flavor (And The Pro Secrets for Velvety Perfection)
You’ve watched the online videos, bought the tahini, and proudly whizzed up your own batch of hummus. And yet, the result is… meh. It’s often watery, grainy, or utterly devoid of that bright, tangy, garlicky punch you crave from your favorite Middle Eastern restaurant. I’ve been there. For years, my homemade hummus was an exercise in bland disappointment. It tasted like chickpeas and not much else, or had a chalky texture that clung to the roof of my mouth. I dutifully followed recipes, added the lemon, the garlic, the tahini – but the magic just wasn’t happening.
Then, after countless trials (and far too many wasted chickpeas), I discovered that the secrets to truly great hummus aren’t found in a complex list of ingredients, but in the preparation and technique that most home cooks completely overlook. It’s about respecting the ingredients, understanding their chemistry, and making a few strategic, non-obvious shifts that elevate your hummus from passable to absolutely phenomenal. This isn’t just about throwing things in a food processor; it’s about crafting a smooth, rich, and intensely flavorful dip that will have your friends begging for the recipe – and thinking you bought it from a gourmet deli.
Key Takeaways
- Achieve incredibly smooth hummus by thoroughly peeling chickpeas or using baking soda during cooking to break down skins.
- Always warm your chickpeas before blending, as it helps them emulsify better with tahini and liquids.
- Use high-quality, intensely roasted tahini and blend it thoroughly with lemon juice and water first for a creamy base.
- Ice-cold water is crucial for achieving an impossibly light and airy texture during the final blending stage.
- Don’t be shy with fresh garlic and lemon juice, and season gradually to build complex, balanced flavor.
The Chickpea Conundrum: Texture Starts Here (Not Just Blending)
Most recipes tell you to use canned chickpeas, rinse them, and then blend. While convenient, this is the first and most significant roadblock to truly velvety hummus. The skins on chickpeas, even cooked ones, are tough. They prevent a truly smooth texture, leading to that slightly grainy, chalky mouthfeel.
What most people miss: It’s not about how long you blend, but what you blend. Those skins need to go. In my early attempts, I would blend for five, ten, even fifteen minutes, only to end up with a warm, slightly sludgy, still-grainy mess. The solution? Two options, depending on your dedication:
- The Manual Peel (for canned chickpeas): This is tedious but incredibly effective. Drain and rinse your canned chickpeas. Gently pinch each chickpea between your thumb and forefinger. The skin will slip right off. Discard the skins. Yes, it takes time – about 15-20 minutes for a standard can – but the difference in texture is revolutionary. This is what many professional chefs do.
- The Baking Soda Boil (for dried chickpeas): If you’re using dried chickpeas (which I highly recommend for superior flavor), soak them overnight. Then, before boiling, add about 1 teaspoon of baking soda to the soaking water (for 1 cup of dried chickpeas). This alkalinity helps break down the pectin in the chickpea skins, making them incredibly tender and easy to blend without individual peeling. When you boil them, the skins will practically dissolve, or at least become so soft they won’t interfere with the blend. Cook them until they are very soft – almost falling apart – not just al dente. This typically takes 1.5 to 2 hours in a pot, or about 45 minutes in a pressure cooker.
I used to think peeling was an unnecessary extra step, pure culinary snobbery. But the first time I made a batch of hummus with peeled chickpeas, the transformation was so profound, I was genuinely shocked. It went from a good dip to an amazing dip, purely based on texture. You’ll never go back.
The Warmth Factor: Unlocking Emulsion and Flavor
Another critical, often-ignored step is ensuring your chickpeas are warm, even hot, when you blend them. This might seem counter-intuitive, especially if you’re reaching for a cold can from the pantry or fridge, but it’s a game-changer.
What most people miss: Warm chickpeas release their starches more readily and emulsify far better with the tahini, lemon juice, and water. When I first started making hummus, I’d rinse canned chickpeas with cold water and toss them straight into the food processor. The resulting hummus was thick, sometimes pasty, and never achieved that light, almost fluffy consistency I craved.
My process now: If using canned chickpeas, drain and rinse them, then transfer them to a small pot with a splash of fresh water. Simmer gently for 5-7 minutes, until they are heated through and very tender. Don’t let them dry out. If using dried chickpeas, obviously, they’ll be hot right out of the pot. Immediately after cooking (and peeling, if you choose that route), transfer them to the food processor.
I’ve found that this warmth helps create a superior emulsion, preventing separation and contributing to that smooth, unified texture. It makes the blending process more efficient, requiring less scraping down the sides and less chance of overworking the tahini, which can lead to bitterness.
Tahini, Lemon, and the Ice Water Secret: Building the Dream Base
The trinity of tahini, lemon juice, and water forms the backbone of hummus flavor and texture. Most recipes tell you to dump everything in at once. This is a mistake.
What most people miss: The initial tahini, lemon, and water mixture needs to be whipped into submission. And here’s the kicker: use ice-cold water for the final blending. This is the ultimate pro secret.
- The Tahini First Rule: Start by blending your tahini, lemon juice, and a few tablespoons of water (not ice water yet!) alone in the food processor for at least 1-2 minutes. You’ll see a magical transformation: the thick tahini will lighten in color, become incredibly creamy, and almost fluffy. This pre-emulsification prevents a thick, gloopy tahini paste from seizing up later when chickpeas are added. The quality of your tahini also matters immensely. Seek out a brand that’s intensely roasted and has a smooth, pourable consistency. Thin, pale tahini will yield a thin, pale hummus both in color and flavor.
- Garlic & Salt Integration: Once your tahini base is whipped, add your fresh garlic and salt. Blend for another 30 seconds to a minute. This ensures the garlic is finely minced and its flavor is evenly distributed without leaving raw chunks.
- The Ice Water Infusion: Now, here’s where the real magic happens. Add your warm, peeled/softened chickpeas to the tahini-garlic mixture. Start blending. While the food processor is running, slowly drizzle in ice-cold water, a tablespoon at a time. The cold water does two amazing things: it helps to lighten the mixture, creating that desired airy, fluffy texture, and it also brightens the flavor, preventing the hummus from becoming dull and heavy. I typically use about 1/4 to 1/2 cup of ice water for a standard can of chickpeas, adjusting until the consistency is perfect – thick enough to scoop, but light enough to spread easily. Taste and adjust seasoning as you go.
This technique completely transformed my hummus. It went from a dense, slightly sticky spread to a light, airy, and truly luscious dip. The textural difference alone is worth the extra few steps.
Don’t Be Shy: Building Bold, Balanced Flavor
Blandness is the most common complaint about homemade hummus. This usually stems from a timid hand with key flavor components.
What most people miss: Flavor needs to be built and balanced, not just added. Many people add a small amount of lemon or garlic, taste, and think they’re done. But hummus benefits from bold, assertive flavors that sing.
- Garlic: Use fresh, not powdered, garlic. For a standard can of chickpeas, I use at least 2-3 medium cloves, sometimes 4. If you’re worried about raw garlic intensity, you can mince it finely and let it sit in the lemon juice for 5-10 minutes before adding to the tahini. This mellows it slightly. For an even more complex, less pungent garlic flavor, you can roast a whole head of garlic until soft, then squeeze the cloves into the hummus.
- Lemon Juice: Freshly squeezed is non-negotiable. Bottled lemon juice tastes flat and lacks the vibrant acidity. I typically start with the juice of one large lemon (around 3-4 tablespoons) and adjust. Hummus needs a good amount of acidity to balance the richness of the tahini and the earthiness of the chickpeas. It should have a noticeable tang.
- Salt: Salt enhances all other flavors. I start with 1/2 teaspoon of fine sea salt for a standard can of chickpeas and add more gradually. Taste, taste, taste! It’s incredible how a pinch more salt can suddenly make all the other flavors pop.
- Cumin: While optional for some, a pinch of ground cumin (1/2 teaspoon or so) adds a warm, earthy depth that is characteristic of classic hummus. Toasting whole cumin seeds briefly and then grinding them fresh will provide an even more aromatic boost.
I learned to adjust these elements incrementally. I’d blend, taste, add a little more lemon, blend, taste, add a pinch of salt, blend again. This iterative process ensures the flavor profile is perfectly balanced to your preference, rather than just relying on a fixed recipe amount.
The Chill Time Revelation: Let Flavors Marry
Once you’ve achieved that perfect creamy, airy texture and balanced flavor, your work isn’t quite done. Rushing to serve it immediately is another common mistake.
What most people miss: Hummus, like many dips and sauces, benefits immensely from a period of chilling. This allows the flavors to meld and deepen.
I used to be so excited about my freshly made hummus that I’d scoop it right onto a plate. It was good, but it lacked that rich, integrated flavor. Now, I always transfer my hummus to an airtight container, press a piece of plastic wrap directly onto the surface (to prevent a skin from forming), and refrigerate it for at least 2 hours, ideally longer, even overnight.
During this chilling period, the flavors marry, the garlic mellows slightly into the background, and the overall profile becomes more harmonious. It also firms up slightly, achieving that ideal spreadable consistency that holds its shape on a plate.
Frequently Asked Questions
Q: My homemade hummus is still grainy, even after blending for a long time. What am I doing wrong?
A: The most common culprit is not adequately removing or softening the chickpea skins. For canned chickpeas, try peeling each one individually (though tedious, it’s highly effective). If using dried chickpeas, add 1 teaspoon of baking soda to the soaking water before boiling them until very soft. This helps break down the skins for a smoother blend.
Q: Why is my hummus too thick or pasty?
A: This can happen if your chickpeas weren’t warm enough during blending, or if you didn’t emulsify the tahini, lemon, and water mixture thoroughly before adding the chickpeas. Also, ensure you’re adding enough liquid (preferably ice-cold water) gradually while blending, until the desired consistency is reached.
Q: My hummus tastes bland, even with lots of lemon and garlic. How can I boost the flavor?
A: Beyond using fresh garlic and lemon juice, ensure you’re salting aggressively enough – salt enhances all other flavors. A pinch of ground cumin adds warmth. Consider a high-quality, intensely roasted tahini, as its flavor forms the base. Also, allowing the hummus to chill for at least 2 hours after blending helps flavors meld and deepen.
Q: Can I use pre-minced garlic or bottled lemon juice?
A: While convenient, pre-minced garlic and bottled lemon juice will significantly compromise the flavor of your hummus. Freshly squeezed lemon juice provides vibrant acidity, and fresh garlic offers a pungent, complex aroma that bottled versions simply can’t replicate. It’s worth the extra minute for a superior result.
Q: How long does homemade hummus last in the fridge?
A: Properly stored in an airtight container with plastic wrap pressed directly onto the surface, homemade hummus will last for 4-5 days in the refrigerator. Drizzling a thin layer of olive oil on top before storing can also help preserve its freshness and prevent drying out.
Conclusion: Your Journey to Perfect Hummus
Making truly exceptional hummus at home isn’t about finding a magic ingredient; it’s about mastering a few key techniques that transform humble chickpeas into a creamy, flavorful masterpiece. By taking the time to address those stubborn chickpea skins, ensuring your chickpeas are warm, thoroughly emulsifying your tahini base, leveraging the power of ice-cold water, and building flavor assertively, you’ll elevate your hummus from an afterthought to the star of any meal.
My own hummus journey was a testament to these small, often overlooked details. The first time I served a batch made with these methods, the compliments were immediate and genuine. People asked for the recipe, assuming it was some secret blend of spices. But the real secret was simply technique. So, next time you decide to make hummus, remember these shifts. Your taste buds (and your guests) will thank you for it. Go forth and blend with confidence – your velvety, flavorful hummus awaits!
Written by Marcus Thorne
Smart shopping and consumer insights
With a background in consumer advocacy, Marcus is passionate about helping people make informed purchasing decisions.
You Might Also Like

Why Your DIY Furniture Makeover Chips and Peels (And How to Get a Lasting, Pro Finish)
Stop chipping and peeling! Discover the overlooked mistakes in DIY furniture makeovers and pro techniques for a durable, flawless finish that lasts.

Why Your Homemade Cookies Are Flat, Not Puffy (And The Pro Secrets That Guarantee Bakery-Perfect Results Every Time)
Ever wonder why your homemade cookies spread flat instead of staying puffy? Discover the pro secrets to achieve bakery-perfect results.
Why Your Homemade Cookies Are Flat, Not Puffy (And The Pro Secrets That Guarantee Bakery-Perfect Results Every Time)
Tired of flat cookies? Discover the overlooked mistakes in your baking and the pro secrets for perfectly puffy, chewy cookies every time.